Update: This is an old post and the information and ideas presented may no longer be relevant.
After launching the redesign of this website a couple of weeks ago, we’ve gotten a few questions about how we configured WordPress to make the site work the way it does. This blog gives me the perfect opportunity to answer those questions and perhaps contribute a little back to the community.
The Need For a CMS
A little background: We launched our first site rather hastily last year with the intentions of updating it as time went on. Unfortunately, it was fairly static and I was the only one able to update it. Considering how busy I was, the site became stagnant and outdated. During the redesign process, we decided that a CMS would be beneficial to keep the site from reaching that point again. I looked into multiple open source solutions, but found most of them were overkill for our needs. We decided to stick with something that we were familiar with: WordPress.
WordPress is developed as a blogging platform, but it contains functionality for writing pages outside of the blog hierarchy and an extensive API that makes writing plugins to easily extend the functionality quite simple. We only wanted a few pages to let prospective clients know what we do and give them the ability to contact us. We also wanted a blog for various reasons, namely to keep content fresh, to develop a quality inbound link structure by writing (hopefully) quality content, to release goodies that might be beneficial to the community that we’ve relied on to learn so much about our profession, and to make new contacts.
The rest of this post will deal specifically with the way WordPress is configured to run the Blazer Six website. Just as a quick summary, the following will detail how to install WordPress in a subdirectory other than the root, but still have it accessible from the root and we will also set up a faux directory structure to make your blog appear to be a separate entity from the website. You will need at least version 2.1 of WordPress to follow this guide.
Directory Structure
WordPress likes to store quite a few files in the root directory and along with the default files that typically go in the root (.htaccess, favicon.ico, robots.txt, Google and Yahoo authorization files, etc.), it can get cluttered fairly quickly. Fortunately, it’s trivial to install WordPress in a subdirectory and make your site or blog accessible from the root.
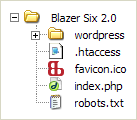 I put my WordPress install in a subdirectory named /wordpress/, but if you look at all of the URLs on this site, none of them will contain /wordpress/, with one exception: files uploaded through the WordPress administration interface will have /wordpress/ in the URL. Other than that, your visitors shouldn’t be able to tell where your install resides and you get to keep your root directory clutter free.
Setting Up Pages
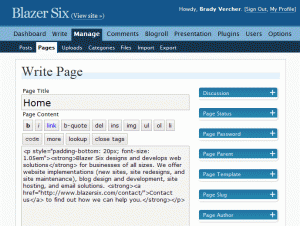 Setting up pages should be the next step. If you’ll notice, we only have four pages here on Blazer Six (Home, Company, Our Work, and Contact). The page that will serve as the home page is the one we want to focus on. Go ahead and create a new page and give it whatever title you’d like and save it. We’ll cover how to set it up as the home page in a later step.
Customizing Permalinks

Some astute readers may wonder how I got the blog to appear to be served from the /blog/ subdirectory. This step is optional, but if you’d like for your blog to appear to be separate from your site, then go ahead and follow these steps.
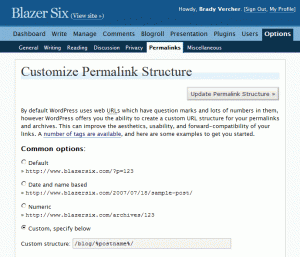 When you configure your permalinks, choose the “Custom structure” option, then prepend /blog to your typical permalink structure. For example, I used /blog/%postname%/. All of your permalinks will now be prepended with /blog and make it appear that your blog is a separate entity from the rest of your site. A /blog/ directory doesn’t actually exist anywhere on my server, though.
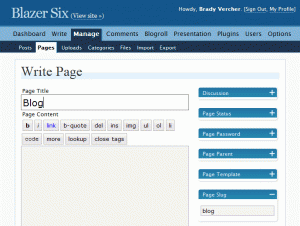 If you’ve been following along, browse to www.yourdomain.com/blog/. You will notice that a 404 error is returned. The problem is that WordPress doesn’t know what to return for this URL. To remedy this, you will need to create a new page called Blog with a page slug of “blog”. If you were to browse to www.yourdomain.com/blog/ now, you’d get a blank page. WordPress still doesn’t know that you want to use this as the posts page.
Choosing the Home and Post Pages
Go to the Options panel, then go to the Reading subpanel. You will want the front page to display a static page, so go ahead and choose that radio button under the Front Page heading. 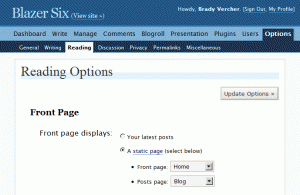 For the front page dropdown, select the home page you created earlier. Now for the posts page option, go ahead and select the blog page you created earlier. That’s it. You should now have a functioning WordPress installation with the core files in a subdirectory, a custom home page, and a blog that appears to be separate from your main site, all easily managed from a single WordPress backend.
If you know a better way to accomplish these goals with WordPress or if you have a different solution for using WordPress as a CMS, I’d be interested in hearing them. Leave a comment and let me know.
Leave a Reply